PKS Pizza Dough

We sell fresh made-in-house and ready-to-bake pizza dough here at the Prairie Kitchen Store.

Quality flour and a (minimum) 24-hour fermentation allow for a light & airy, flavorful dough that'll beat any store-bought crust on the shelves.

We make the dough in the PKS kitchen with the same recipe, care and love we've used to make dough for our family pizza parties for many, many years. We hope you'll enjoy it just as much as we do! And don't forget to check out our selection of specialty pizza cheeses as well!

- The Felker Family

What kind of pizza does it make?

We package our dough in 500g containers ($5.49). With this dough, you can make:

  • Two 10” round Neapolitan style pizzas
    (Our favorite) or
  • Two 12” round thin and crispy style pizzas or
  • One 16” round NY-style pizza or
  • One 12” round thick crust pan-style pizza

Making Pizza on a Pizza Stone/Steel at Home...

Full recipe and instructions:

1. Two to three hours before you're ready to bake the pizza...

You're going to want to remove the pizza dough from your refrigerator 2-3 hours before you bake it, to allow it to come to room temperature and rest. Pull the dough ball out of the container and divide the dough into portions for the pizza style you are making. If not using all the dough, place remaining dough back into the container and refrigerate for future use. 

Form the dough portions into balls:

  1. Generously dust both sides of the dough with flour.
  2. Place the dough portion between your hands and fold in the edges by pressing them into the center of the dough. This is going to be the seam side. The opposite side should look smooth and seamless.
  3. With the seam side facing away from you, rotate the ball ninety degrees. Gather and fold the edges into the center of the dough again.

Repeat this process about 10-15 times. Each time the portion gets more and more taut. Be careful to be firm but not aggressive; you don't want to tear the gluten strands.

Once the dough ball is nice and taut, place the smooth side in your palm and swiftly pinch the seam closed. This is the part where we trap all the carbon dioxide inside the ball. Be aggressive with the pinch.

Let the dough balls relax at room temp, covered, for 2-3 hours. Lightly dust the balls with flour, place on a sheet pan or plate and gently cover with plastic wrap or a damp cloth.

2. Preheating the oven...

(Do so at least 15 minutes but up to 1 hour before baking, depending on your oven setup -- see below)

  1. For the home oven, we recommend baking your pizza on a pizza stone or baking steel. For the thin crust pizzas, you can also bake your pizza on a traditional pizza pan or sheet pan without the stone or steel.
  2. Place the pizza stone or steel on the lowest possible rack to ensure a crispy bottom crust.
  3. Preheat your oven as high as possible (typically 500-550 degrees F) with the pizza steel or pizza stone in the oven for a full hour, allowing it to get really hot before cooking the pizza. If not using a pizza stone or steel, preheat for about 15 minutes.
  4. For an outdoor pizza oven, follow your manufacturer’s directions for preheating. NOTE: This pizza dough should not be baked above about 700 degrees F.

3. Stretching your dough before baking...

(Do this right before baking each pizza)

For thin and crispy style, to stretch out the dough, place a dough ball on a lightly floured work surface and start by pressing down with your fingers in the center of the pizza dough, then working your way towards the outer crust until the dough is at least 6” in diameter. 

Then, use a rolling pin, roll it horizontally and vertically to work it into a circle about 11-12 inches across. Knock out any additional air bubbles in the outer crust by hand to ensure the dough stays flat as it cooks. You can also use a dough docker. Docking is the process of sealing the top and bottom layers of the dough together to control the bubbling. You should not puncture all the way through the dough.

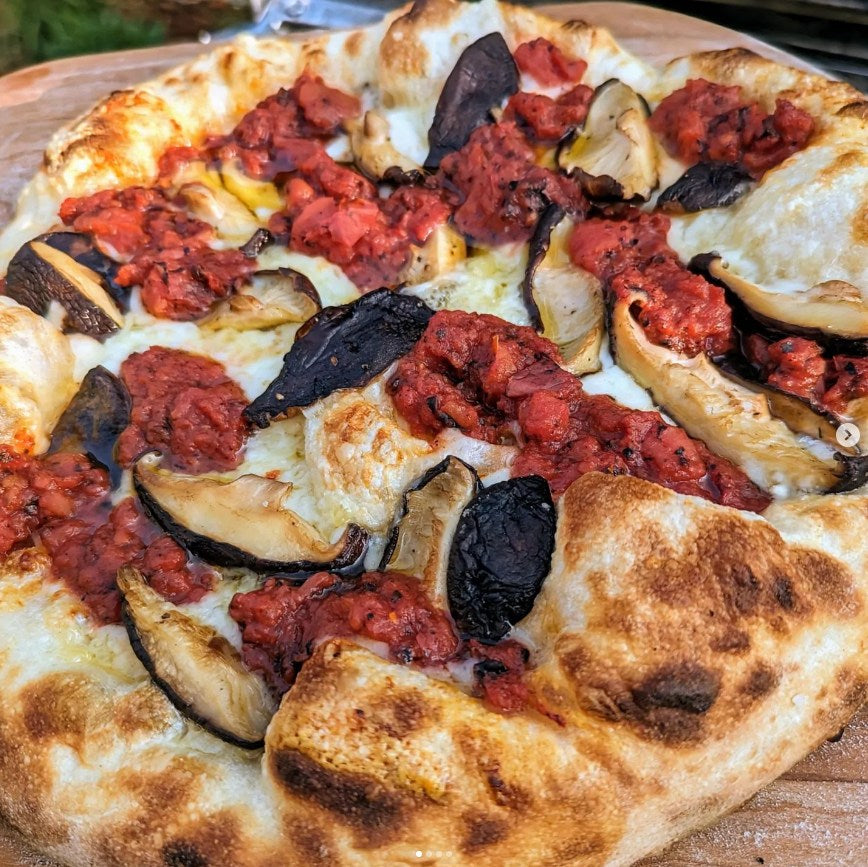
For Neapolitan style, we want to preserve all of the air in the outer crust, so go easy on the outer crust when stretching. To stretch out the dough, place a dough ball on a lightly floured work surface and start by pressing down with your fingers in the center of the pizza dough, then working your way towards the outer crust until the dough is at least 6” in diameter. Leave a raised crust on the outer edge of your crust.

Then, pick up the pizza by hooking your fingers under the outer crust. You’ll slowly turn the pizza like a wheel, allowing gravity to stretch the pizza into a 10” diameter crust.

For NY style, we want to preserve some of the air in the outer crust. So go easy on the outer crust when stretching or rolling. To stretch out the dough, place a dough ball on a lightly floured work surface and start by pressing down with your fingers in the center of the pizza dough, then working your way towards the outer crust until the dough is at least 6” in diameter. Leave a raised crust on the outer edge of your crust.

Then, roll or hand stretch your dough into a 14” - 16” round.

For pan style pizza, generously oil your pan and then put the dough in your oiled pan. Use your fingers to gently press/stretch the dough to fill out the pan. When you’ve stretched it about as much as you can without tearing the dough, let the dough rest, covered, for about 15 minutes. Then get back and press and stretch the dough again, doing your best to get the dough to the edge of the pan. It’s going to shrink back a bit, but it doesn’t have to be perfect. Pop all the air bubbles.

4. Topping your pizza...

If you are baking your pizza directly on a pizza stone or steel (or using an outdoor pizza oven):

For the thin and crispy, Neapolitan, and NY style dough, place your stretched dough on a pizza peel lightly dusted with flour. I like to use a combination of semolina flour and bread flour. Give the dough a little “shake” to be confident the dough is loose on the peel. If the dough doesn’t move, add a bit more flour and try again.

At this point, you’re ready to top your pizza with your toppings. Note…less is more for topping any of these kinds of thin crust pizzas.

If you are baking your thin and crispy, Neapolitan, or NY style dough in a traditional pizza pan (not using a pizza stone or steel):

Transfer your stretched dough into the lightly oiled pizza pan. 

At this point, you’re ready to top your pizza with your toppings. Note…less is more for topping any of the thin crust pizzas.

For thick crust pan style pizza, your stretched dough is already in the pan. No pizza peel is necessary. At this point, you’re ready to top your pizza with your toppings.

5. Time to bake...

For the thin and crispy, Neapolitan, and NY style pizzas baked directly on a pizza stone or steel or in an outdoor pizza oven:

  1. Using the pizza peel, launch your pizza onto your stone or steel.  
  2. Cook for 2-3 minutes, then open the oven and rotate 180 degrees.  
  3. Cook for another 2-3 minutes, or until desired doneness.
  • Also, check the underside of the pizza for desired doneness. It may need another minute or so to crisp the underside.
  • If using a home oven: consider using the broiler to finish the pizza for a minute or so to really crisp up the top of the pizza.

When you remove the pizza from the oven, place it on a cooling grid and let cool for a couple minutes before cutting and serving on a board.

For the thin and crispy, Neapolitan, and NY style pizzas baked in a traditional pizza pan or sheet pan:

  1. Place pizza in oven 
  2. Cook for 4-5 minutes, then open the oven and rotate 180 degrees.  
  3. Cook for another 4-5 minutes, or until desired doneness.
  • Also, check the underside of the pizza for desired doneness.

When you remove the pizza from the oven, place it on a cooling grid and let cool for a couple minutes before cutting and serving on a board.

For thick crust pan style pizza:

  1. Bake for 10-15 minutes or until the cheese is bubbly and starting to brown. 
  2. Rotate the pan 90 degrees every 3-4 minutes.
  3. Remove the pan/skillet and place on the stovetop; let cool for a few minutes.
  4. Slide a metal spatula under the pie and place on a cooling grid; and let cool for a couple more minutes.
  5. Move to a cutting board, cut and serve.